How to Plan an Alaskan Cruise

Introduction

Planning an Alaskan cruise is an exciting endeavor, offering breathtaking landscapes, unique wildlife, and unforgettable experiences. Whether you’re a first-time cruiser or a seasoned traveler, careful planning ensures you make the most of your journey through the Last Frontier.

Best Time to Cruise Alaska

The Alaskan cruise season typically runs from May to September. The peak months are June through August, offering warmer temperatures and more wildlife sightings. However, traveling in May or September can provide fewer crowds and potential cost savings

Choosing the Right Itinerary

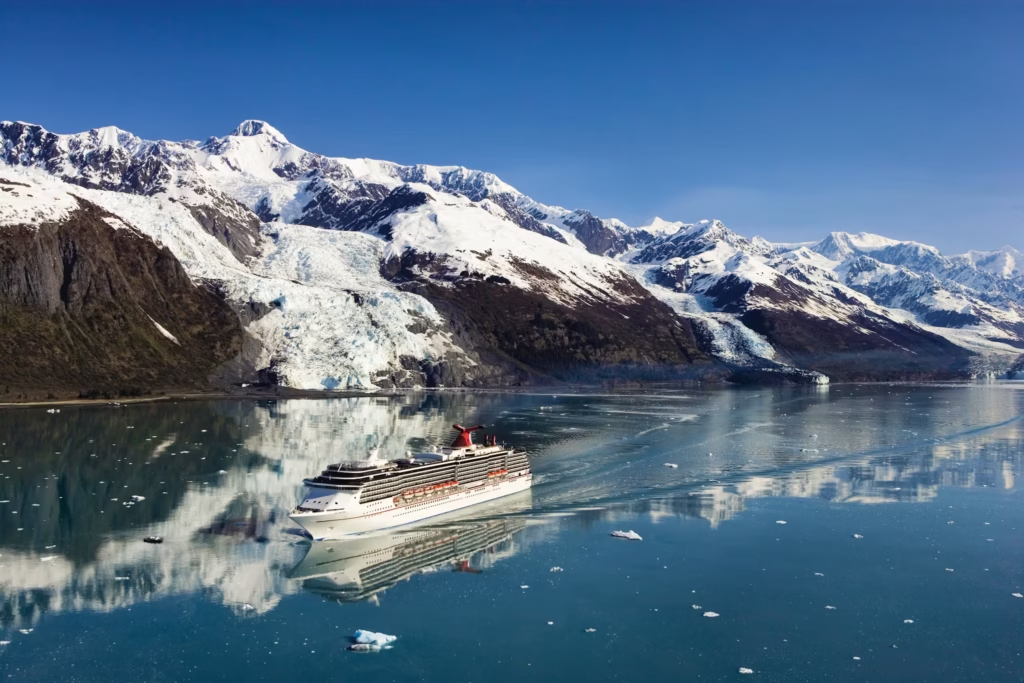
Alaska cruises primarily offer two types of itineraries:

  • Inside Passage: A round-trip journey from Seattle or Vancouver, exploring coastal towns like Juneau, Ketchikan, and Skagway.
  • Gulf of Alaska: A one-way cruise between Seward or Whittier and Vancouver, often including scenic cruising in Glacier Bay or College Fjord.

Consider the duration, ports of call, and scenic opportunities when selecting your itinerary.

Selecting a Cruise Line

Several cruise lines operate in Alaska, each offering unique experiences:

  • Holland America and Princess Cruises: Known for their extensive Alaskan itineraries and land tour options.
  • UnCruise Adventures and Alaskan Dream Cruises: Offer small-ship experiences with more intimate and adventurous excursions.

Choose a cruise line that aligns with your preferences, whether it’s luxury, adventure, or family-friendly activities.

Packing Essentials

Alaska’s weather can be unpredictable, so packing appropriately is crucial:

Booking Shore Excursions

Enhance your cruise experience by booking shore excursions:

  • Wildlife Viewing: Whale watching, bear viewing, and bird watching.
  • Adventure Activities: Zip-lining, kayaking, and hiking.
  • Cultural Experiences: Visiting native villages and historical sites.

It’s advisable to book excursions early, as popular tours can sell out quickly.

Cruise Tips and Advice

  • Book Early: Secure the best cabins and excursions by booking 6–12 months in advance.
  • Consider a Balcony Cabin: Offers private views and a comfortable space to enjoy Alaska’s scenery.
  • Stay Active: Participate in onboard activities and attend lectures about Alaskan wildlife and culture.
  • Respect Local Communities: Be mindful of the environment and local customs, especially in smaller ports.

Table of Contents

Conclusion

Introduction

Best Time to Cruise Alaska

Choosing the Right Itinerary

Selecting a Cruise Line

Packing Essentials

Booking Shore Excursions

Cruise Tips and Advice

Conclusion

An Alaskan cruise is a remarkable journey that combines natural beauty, adventure, and cultural discovery. By carefully planning your itinerary, selecting the right cruise line, packing appropriately, and booking excursions in advance, you can ensure a memorable and enjoyable experience in Alaska’s stunning wilderness.

Old Fashioned Rolled Sugar Cookie Recipe

Introduction

Old-fashioned rolled sugar cookies are a delightful treat that brings back cherished memories of family gatherings and festive celebrations. These cookies are known for their soft texture, subtle sweetness, and versatility in decoration. Whether you’re baking for a holiday, a special occasion, or simply to enjoy a homemade dessert, this classic recipe is sure to please.

Ingredients

To make approximately 4 dozen cookies, you’ll need the following ingredients:

  • 4 cups all-purpose flour
  • 1 teaspoon baking powder
  • ½ teaspoon salt
  • 1 cup unsalted butter, softened
  • 1½ cups granulated sugar
  • 2 large eggs
  • 1 teaspoon vanilla extract
  • 1/3 cup milk

Step by Step Instructions

  1. Prepare Dry Ingredients: In a large bowl, whisk together the flour, baking powder, and salt.
  2. Cream Butter and Sugar: In another bowl, beat the softened butter and granulated sugar until light and fluffy.
  3. Add Eggs and Vanilla: Beat in the eggs, one at a time, ensuring each is fully incorporated. Add the vanilla extract and mix well.
  4. Combine Wet and Dry Ingredients: Gradually add the dry ingredients to the wet mixture, alternating with the milk. Mix until a dough forms.
  5. Chill the Dough: Divide the dough into two portions, wrap each in plastic wrap, and refrigerate for at least 1 hour.
  6. Preheat Oven: Preheat your oven to 375°F (190°C).
  7. Roll Out Dough: On a lightly floured surface, roll out one portion of dough to about ¼ inch thickness.
  8. Cut Shapes: Use cookie cutters to cut out desired shapes and place them on ungreased baking sheets.
  9. Bake: Bake in the preheated oven for 8-10 minutes, or until the edges are lightly golden.
  10. Cool: Allow the cookies to cool on the baking sheets for a few minutes before transferring them to wire racks to cool completely.

Tips for Success

  • Chill the Dough: Chilling the dough makes it easier to roll out and helps the cookies maintain their shape during baking.
  • Use Parchment Paper: Lining your baking sheets with parchment paper prevents sticking and ensures even baking.
  • Even Thickness: Roll the dough to a consistent thickness to ensure uniform baking.
  • Don’t Overbake: Remove the cookies from the oven when the edges are just turning golden to maintain a soft texture.

Decorating Ideas

  • Royal Icing: Mix powdered sugar with a small amount of water and a meringue powder to create a smooth icing for decorating.
  • Colored Sugar: Sprinkle colored sugar on the cookies before baking for a festive touch.
  • Sprinkles: Add sprinkles after baking while the cookies are still slightly warm to ensure they stick.
  • Glaze: For a simple finish, drizzle a glaze made of powdered sugar and milk over the cooled cookies.

Storage and Shelf Life

  • Room Temperature: Store the cooled cookies in an airtight container at room temperature for up to 1 week.
  • Freezing: For longer storage, freeze the baked cookies in a single layer on a baking sheet, then transfer to a freezer-safe container or bag. They can be stored for up to 3 months.

Table of Contents

Conclusion

Introduction

Ingredients

Step-by-Step Instructions

Tips for Success

Decorating Ideas

Storage and Shelf Life

Conclusion

This old-fashioned rolled sugar cookie recipe is a timeless classic that brings warmth and joy to any occasion. With its simple ingredients and straightforward process, it’s perfect for bakers of all skill levels. Whether enjoyed plain or adorned with festive decorations, these cookies are sure to become a beloved tradition in your home. Happy baking

Old Fashioned Blackberry Jam Recipe

Introduction

Blackberry jam is a delightful treat that captures the essence of summer in every spoonful. Making it the old-fashioned way, without added pectin, allows the natural flavors of the blackberries to shine through. This method is not only traditional but also ensures a more authentic taste.

Ingredients

To make approximately 2 half-pint (8 oz.) jars of blackberry jam, you will need:

  • 4 cups fresh blackberries: Ensure they are ripe and free from blemishes.
  • 2 cups granulated sugar: This helps in preserving the jam and balancing the tartness of the berries.
  • 2 tablespoons lemon juice: Adds acidity, which aids in the gelling process and enhances flavor.

Note: Using fresh blackberries is recommended for the best results. If using frozen berries, thaw them before use.

Preparation

  1. Sterilize Jars: Wash the jars and lids with hot, soapy water. Place them in a preheated oven at 180°C (350°F) for 10 minutes to sterilize.
  2. Prepare Berries: Rinse the blackberries thoroughly under cold water. Remove any stems or leaves.
  3. Mash Berries: In a large saucepan, mash the blackberries using a potato masher or fork until they release their juices.

Cooking the Jam

  1. Combine Ingredients: Add the mashed blackberries, granulated sugar, and lemon juice into the saucepan. Stir well to combine.
  2. Cook the Mixture: Place the saucepan over medium heat. Stir the mixture continuously to prevent burning. Allow it to come to a boil.
  3. Boil: Once boiling, reduce the heat slightly and let it simmer. Stir frequently to ensure even cooking.

Cooking time may vary, but typically it takes about 20-30 minutes for the jam to reach the desired consistency.

Testing for Doneness

To check if the jam has set:

  1. Cold Plate Test: Place a small plate in the freezer before starting the jam. When you think the jam is ready, drop a small amount onto the cold plate. Return it to the freezer for about 1 minute. Run your finger through the jam; if it wrinkles and holds its shape, it’s done. If not, continue boiling and test again in a few minutes.

Canning and Storing

  1. Fill Jars: Carefully ladle the hot jam into the sterilized jars, leaving about 1/4 inch of headspace at the top.
  2. Seal Jars: Wipe the rims of the jars with a clean, damp cloth to remove any residue. Place the sterilized lids on top and screw on the metal bands until they are fingertip-tight.
  3. Process Jars: Place the filled jars in a boiling water bath, ensuring they are covered by at least 1 inch of water. Process for 10 minutes.
  4. Cool and Store: After processing, remove the jars and let them cool completely on a clean towel. Once cooled, check the seals by pressing the center of each lid. If it doesn’t pop back, the jar is sealed properly. Store sealed jars in a cool, dark place. Unsealed jars should be refrigerated and used within a few weeks.

Serving Suggestions

Homemade blackberry jam is versatile and can be enjoyed in various ways:

Conclusion

  • Spread on toast, biscuits, or scones.
  • Swirled into yogurt or oatmeal.
  • Used as a topping for pancakes or waffles.
  • Incorporated into desserts like cakes or pastries.

Table of Contents

Introduction

Ingredients

Preparation

Cooking the Jam

Testing for Doneness

Canning and Storing

Serving Suggestions

Conclusion

Making old-fashioned blackberry jam without added pectin is a rewarding process that results in a delicious, natural spread. By following these steps, you can enjoy the sweet and tangy flavors of summer all year round. Happy jamming!

A Quilt Stitched with Memories

Introduction

Quilting is an ancient craft that has been passed down through generations. While quilts have traditionally been used for warmth and comfort, they have also served as canvases for storytelling. Memory quilts, in particular, are created to honor and preserve the memories of loved ones, significant events, or cherished moments. These quilts are often made from clothing, fabrics, or items that hold sentimental value, transforming them into lasting tributes.

The Art of Memory Quilting

Memory quilting involves selecting fabrics that hold personal significance and stitching them together to create a cohesive design. Each piece of fabric tells a story, whether it’s a piece of a grandmother’s dress, a child’s favorite t-shirt, or a fabric from a memorable trip. The process of selecting, cutting, and stitching these fabrics requires time, patience, and a deep connection to the memories they represent.the design of a memory quilt can vary greatly, from traditional patterns to freeform designs. Some quilters choose to incorporate photographs, embroidery, or other embellishments to further personalize the quilt. The beauty of memory quilting lies in its flexibility and the ability to create a piece that is uniquely meaningful to the maker.

Cultural Significance of Quilting

Quilting holds a special place in many cultures around the world. In the United States, quilts have been used as a means of storytelling, preserving family histories, and even as tools for social change. The tradition of quilting bees, where communities come together to quilt, fosters a sense of community and shared purpose.In other cultures, such as in parts of South Asia, quilts known as “Godadi” or “Kantha” are made from old clothing and are often given as part of a bride’s trousseau. These quilts are not only practical but also carry deep cultural and emotional significance. They represent the continuity of family traditions and the love and care invested in their creation.

Personal Stories Behind Memory Quilts

The true essence of a memory quilt lies in the personal stories behind it. For instance, a woman might create a quilt from her late husband’s shirts, each patch symbolizing a different chapter of their life together. Another might stitch together pieces of her children’s clothes to commemorate their growth and milestones.

These quilts serve as tangible representations of intangible memories. They provide comfort during times of grief, celebrate life’s milestones, and serve as heirlooms that can be passed down through generations. Each quilt is a unique narrative, a personal history woven into fabric.

Creating Your Own Memory Quilt

Creating a memory quilt is a deeply personal and rewarding endeavor. Here are some steps to guide you:

  1. Gather Materials: Collect fabrics that hold sentimental value—old clothing, favorite t-shirts, scarves, or other textiles.
  2. Choose a Design: Decide on a pattern or layout that resonates with you. This could be a traditional quilt block, a photo quilt, or a freeform design.
  3. Prepare the Fabrics: Wash and iron the fabrics to ensure they are clean and smooth. Cut them into the desired shapes and sizes.
  4. Assemble the Quilt: Begin stitching the pieces together, paying attention to the arrangement and ensuring each piece is securely attached.
  5. Add Personal Touches: Consider adding embroidery, photographs, or other embellishments to personalize the quilt further.
  6. Quilt the Layers: Once the top layer is complete, add batting and a backing fabric. Quilt the layers together using hand or machine stitching.
  7. Finish the Edges: Bind the edges of the quilt to give it a polished look and ensure durability.

Throughout the process, take time to reflect on the memories each piece represents. The act of creating the quilt can be therapeutic and fulfilling, allowing you to honor the past while creating something beautiful for the future.

Table of Contents

Conclusion

Introduction

The Art of Memory Quilting

Cultural Significance of Quilting

Personal Stories Behind Memory Quilts

Creating Your Own Memory Quilt

Conclusion

A quilt stitched with memories is more than just a decorative item; it is a heartfelt expression of love, loss, and legacy. Through the art of memory quilting, we can preserve the stories of our lives and the lives of our loved ones. These quilts serve as enduring symbols of the connections we share and the memories we hold dear.Whether you choose to create a memory quilt yourself or receive one as a gift, the significance lies in the stories they tell and the comfort they provide. In a world that is constantly changing, a quilt stitched with memories offers a tangible link to the past and a warm embrace for the future.

Easy Embroidery Kits for Beginners

Introduction to Embroidery

Embroidery is the art of decorating fabric using needle and thread. It’s a craft that has been practiced for centuries, offering a way to personalize clothing, create artwork, and even tell stories through stitches. For beginners, starting with a kit can simplify the process, as these kits typically include everything you need to begin your embroidery journey.

Benefits of Embroidery for Beginners

  • Stress Relief: The repetitive motions of stitching can be meditative, helping to reduce stress and anxiety.
  • Creativity: Embroidery allows you to express your creativity through colors, patterns, and designs.
  • Skill Development: As you progress, you’ll learn various stitches and techniques, enhancing your hand-eye coordination and attention to detail.
  • Personalized Gifts: Handmade embroidered items make thoughtful and unique gifts for friends and family.

What to Look for in a Beginners Embroidery Kit

When selecting an embroidery kit as a beginner, consider the following features:

  • Pre-Printed Patterns: These eliminate the need for transferring designs onto fabric, making it easier to start stitching immediately.
  • Clear Instructions: Step-by-step guides or video tutorials can help you learn new stitches and techniques.
  • Quality Materials: Look for kits that include high-quality threads, needles, and fabric to ensure a pleasant stitching experience.
  • Suitable Designs: Choose designs that match your interests and skill level, whether it’s floral patterns, animals, or inspirational quotes.

Top Easy Embroidery Kits for Beginners

Here are some highly recommended embroidery kits that are perfect for beginners:

Craftwiz 4 Piece Starter Embroidery Kit

This comprehensive kit includes an embroidery hoop, four pre-printed cotton cloths, colorful threads, needles, scissors, a seam ripper, needle threader, and a beginner’s guidebook. The pre-printed designs make it easy to start stitching right away, and the included book offers step-by-step instructions for 29 stitches.

Clever Poppy Beginner Kits

Clever Poppy offers a variety of beginner-friendly kits, each designed with clear instructions and all necessary materials. Their kits, such as the “Stitch Sampler” and “Little Bouquet,” come with access to step-by-step video tutorials, making learning enjoyable and straightforward.

Jessica Long Embroidery Kits

Jessica Long’s kits are known for their modern designs and high-quality materials. The “Spiral Sampler” and “Floral Flourish” kits are particularly popular among beginners for their engaging patterns and comprehensive instructions.

Stitched Stories Beginner Kits

Stitched Stories offers both in-the-hoop and traditional band sampler kits. Each kit includes a bamboo embroidery hoop, cotton fabric with a printed design, DMC embroidery floss, needles, and an illustrated instruction guide. Their kits, such as the “Classic Stitch Sampler,” are designed to help beginners master various stitches while creating beautiful pieces.

Tips for Getting Started

  • Start Simple: Begin with basic stitches like the running stitch, backstitch, and satin stitch before progressing to more complex techniques.
  • Practice Regularly: Consistent practice will help you improve your skills and gain confidence.
  • Use Good Lighting: Ensure you have adequate lighting to reduce eye strain while stitching.
  • Be Patient: Embroidery is a skill that improves over time. Don’t rush; enjoy the process.
  • Join a Community: Consider joining online forums or social media groups to share your progress, ask questions, and gain inspiration.

Table of Contents

Conclusion

Introduction to Embroidery

Benefits of Embroidery for Beginners

What to Look for in a Beginner’s Embroidery Kit

Top Easy Embroidery Kits for Beginners

Tips for Getting Started

Conclusion

Embroidery is a rewarding and accessible craft that offers numerous benefits, from stress relief to creative expression. Starting with an easy embroidery kit can provide all the tools and guidance you need to embark on this enjoyable hobby. Remember to choose a kit that suits your interests and skill level, and most importantly, have fun with the process. Happy stitching!

How to Choose the Best Cruise Ship Cabin

Introduction

Planning a cruise is exciting, but the first big challenge every traveler faces is choosing the right cabin. With so many options—inside, ocean view, balcony, and suites—the decision can feel overwhelming. After analyzing insights from seasoned travelers, cruise bloggers, and even travel agents, we’ve gathered the best tips to help you pick the cabin that matches your budget, lifestyle, and comfort level.

Why Cabin Choice Matters

Your cabin isn’t just a place to sleep—it’s your home at sea. The right choice can provide relaxation, better sleep, stunning views, and privacy. The wrong choice might mean sleepless nights, motion sickness, or wasted money.

Types of Cruise Cabins

Inside Cabin

  • Cheapest option, no windows.
  • Great for travelers who spend little time in the room.
  • Cozy and dark (good for sleeping), but not ideal for those who get claustrophobic.
  • Best for budget travelers who want to save money for excursions.

Ocean View Window Cabin

  • Offers natural light without the cost of a balcony.
  • Some may have obstructed views (like lifeboats or beams).
  • Good middle ground if you want daylight but don’t care much about a view.

Balcony Cabin

  • Private outdoor space with incredible views.
  • Perfect for enjoying coffee, sunsets, or glaciers from your room.
  • Higher price but often worth it for peace, scenery, and personal space.
  • Many travelers say they’d never cruise again without a balcony!

Suites

  • Luxury rooms with more space, exclusive perks, and sometimes butler service.
  • Ideal for honeymoons, anniversaries, or once-in-a-lifetime celebrations.
  • Expensive but provides a 5-star experience at sea.

Factors to Consider Before Booking

  • Budget: Inside cabins save money for excursions, while balcony/suites offer luxury.
  • Travel Style: Extroverts may love inside cabins since they’re always out; introverts may want balconies for private downtime.
  • Special Celebrations: Anniversaries or milestone trips deserve a balcony or suite.
  • Excursions vs. Room Investment: Ask yourself: Would you rather spend on a room or unforgettable shore experiences?

Room Locations What to Avoid

  • Midship on lower decks: Best for stability and avoiding motion sickness.
  • Forward (front): More motion, not ideal if seasickness is a concern.
  • Aft (back): Great views of the wake but more movement.
  • Avoid noisy areas: Cabins near elevators, theaters, or restaurants may disturb light sleepers.

Seasickness Tips Stability Secrets

  • Choose midship cabins on lower decks for the least movement.
  • Use Sea-Bands or motion sickness medication if you’re sensitive.
  • Avoid high decks at the ship’s ends if you get dizzy easily.

Real Experiences Expert Advice

  • Travel Agents recommend considering your needs first, then your budget.
  • Some seasoned cruisers prefer inside cabins—they say you’re “never in your room anyway.”
  • Others can’t imagine cruising without a balcony, especially for scenic routes like Alaska.
  • Pro-tip: Watch YouTube cabin tours before booking.
  • Pick a balcony midship cabin for the best balance of views and stability.
  • Don’t book near noisy venues unless you’re a heavy sleeper.
  • If it’s a special trip, invest in a better room—you’ll remember it forever.
  • Consider whether you’ll spend more time in your cabin or exploring the ship

Table of Contents

  1. Introduction
  2. Why Choosing the Right Cruise Cabin Matters
  3. Types of Cruise Cabins
    • Inside Cabin
    • Ocean View Cabin
    • Balcony Cabin
    • Suite
  4. Key Factors to Consider Before Booking
    • Who You’re Traveling With
    • Location of the Cabin
    • Noise Levels
    • Amenities and Comfort
    • Ocean Views & Obstructions
  5. Personal Experiences and Lessons Learned
    • Budget Travelers’ Choices
    • Seasickness and Stability Concerns
    • Rooms to Avoid (Noisy / Busy Areas)
    • Balcony Fails and Surprises
  6. Tips for First-Time Cruisers
  7. Conclusion

Conclusion

The “best” cruise cabin isn’t the same for everyone—it depends on your budget, lifestyle, and travel goals. Whether you choose a simple inside room, a balcony with stunning views, or a luxurious suite, the key is to align your cabin choice with the kind of cruise experience you dream of. With these tips and real-life insights, you’ll be ready to pick the perfect floating home for your next adventure.